The version of CamoPicker covered by this User's Guide was originally released on 24 December 2011. If you have difficulties understanding what you're reading here, you can contact me through the support page (in the menu above), and I will do my best to clarify any issue you might be having.
Table of Contents
- Introduction
- New Features and Changes in Version 2.n
- Requirements
- Installation
- Major Components
- Running the Application
- Select an Environment Image
- Select Paint System
- Determine Colors
- Manipulating Matched Colors
- Manipulating the Visualized Weapon
- Saving a Visualized Weapon
Introduction
CamoPicker is an application that allows the user (you) to select camouflage colors for specific paint manufacturers based on a picture of your local environment. This page covers version 2 of this application. Once selected, these paint colors can be used to paint guns (the original purpose of the app), or anything else that you might want to conceal.
If you are/were a user of version 1.0, the concepts are generally the same, but the application has been radically refactored to (hopefully) provide more convenient usage, some additional features, as well as make the source code more maintainable in preparation for being posted for other programmers to inspect, evaluate, and even modify as they see fit.
New Features and Changes From Version 1.n
The following new features have been added and changes made:
- Removed the Simple Visualization form from the application. After coding both the advanced
form and the simple form, and then startig this documentation for the app, I came to the
conclusion that the simple form was redundant, and more importantly, pointless. Doing this also
shortened and simplified this User's Guide.
- Load the last environment image you used without having to browse for it first.
- Set a default weapon and pattern.
- Change the brightness and contrast of the weapon.
- Added the ability to ignore black in the color matching phase (many thanks to
Sniper's Hide forums user,
dangedan, for the idea).
- The group boxes that delineate groups of controls are more visually discernible, and to make
all of the controls "fit" on the form, I put most of them into tabs on the page.
- Save your own pattern color groups and apply those color groups to new visualizations
- You can now save your configured weapons for recall at a later date.
- The application is now provided in the form of a MSI file so you can "install" it (and
unsinstall it).
- Some usability enhances were added, such as immediate visualization after you've
clicked the "Get Colors" button.
Requirements
- Microsoft Windows XP (any version, with Service Pack 3) is the absolute minimum
- Microsoft .Net Framework 4.0 (the installer will prompt you to indstall it if necessary)
- 10mb of hard drive space on the drive where you install the application
- 1GB of RAM (it might run on less, but all of my machines have 4-16GB)
Installation
Installation is nothing more exciting than your standard Windows application installation process. It will prompt you to install the appropriate version of .Net if necessary, and then the application will install. I'm sure most of you have encountered the occasional application installer that prompts you (if you're lucky) to install various crapware, such as the Yahoo toolbar, or other similar chaff. If you're installing CamoPicker, and you see this, I DID NOT ADD IT, and you should IMMEDIATELY cancel the install, and get the installer directly from this web site.
Major Components
So that we're all singing out of the same hymnal, so to speak, let's identify the major components of the CamoPicker window.
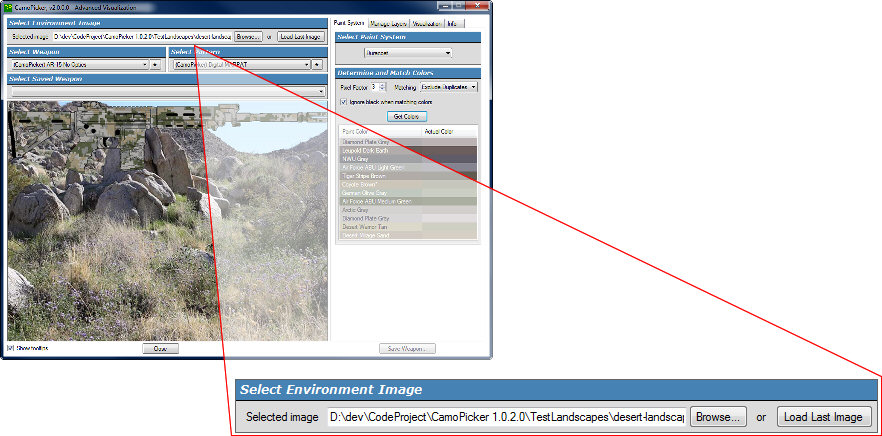
This is where we select the environment image. The environment image is what drives the color matching.
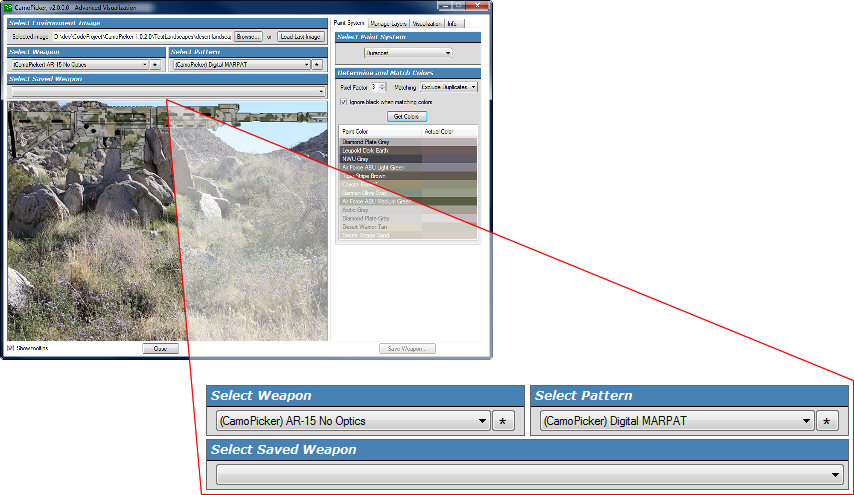
This is where we select the weapoon template and camo pattern (or a saved weapon).
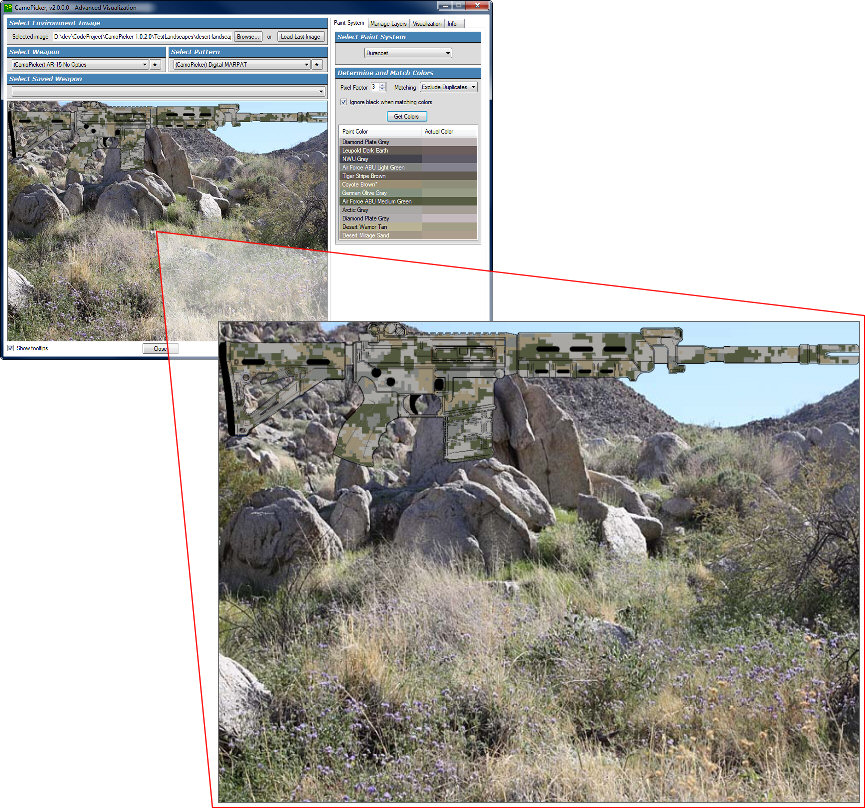
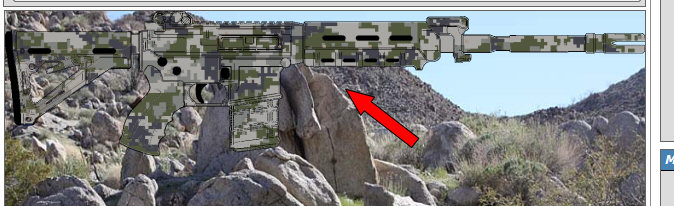
This is the weapon panel, and is where the environment image and weapon are visualized.
These are the visualization tabs and is where you change the colors, and other aspects of the visualized weapon.
Running the Application
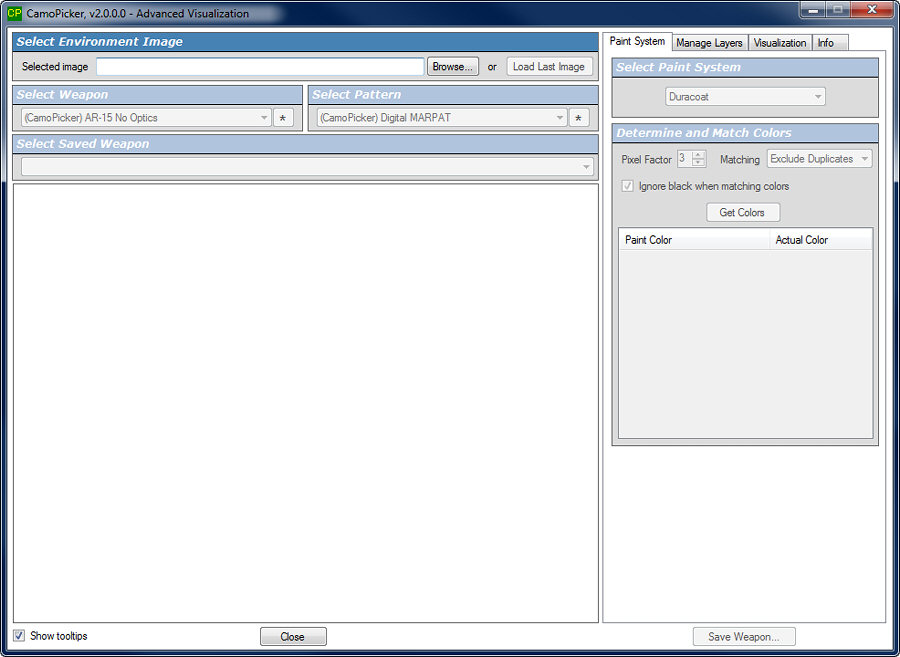
This section of the user's Guide will get you started using CamoPicker with its default object settings, so that may become familiar with the way the program works. Afterwards, we'll discuss the various weapons, patterns, and paint systems in more detail. When you first start CamoPicker, you are greeted with this window.
You may have noticed that most of the controls on the window appear to be disabled. That's because much of CamoPicker's functionality is dependent on the user taking certain actions in a certain order. For instance, before colors can be matched, an evironment image must be selected and loaded by the user. Similarly, before an weapon can be visualized, colors must be chosen. Let's get started.
Select an Environment Image
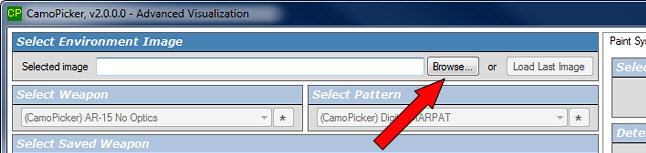
The first thing you need to do is select an environment image. The first time you run CamoPicker, you're going to have to browse for an image. Just click the Browse... button, and a standard Windows File open dialog box will be displayed, allowing to to browse to any folder on your system (or network shares).
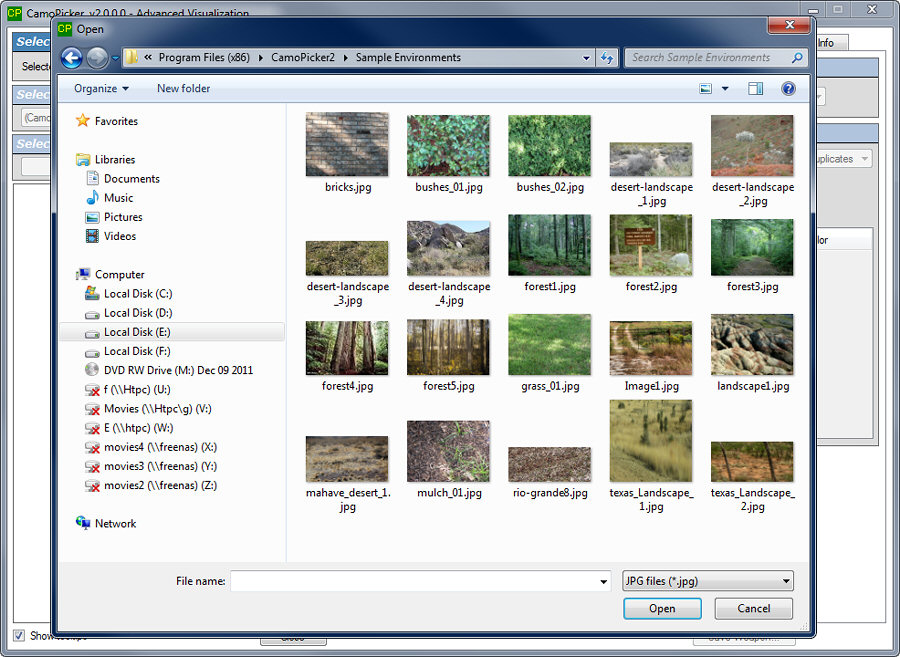
CamoPicker is supplied with several example images, so let's use those for the purposes of this example. When you click the browse button, a new dialog box will be displayed that allows you to browse your system (and network) for appropriate files. Since the sample files are in the CamoPicker\Sample Environment folder, we'll browse to that folder. When we get there, you'll see something like this:
As you can see, the available environment images are of various types of landscapes. You wil also notice that the images are of varying size. CamoPicker will scale the image to fill the weapon panel, and you should be aware that this could skew the color matching because a given color may become more (or less) prominent in the stretched image than it would if the image was not being resized. To mitigate this possible side effect, try to use images that are close to a 4:3 size ratio. The weapon panel itself is 640x480, and it is highly recommended that you try to use images that are at least that large or larger (it's better to shrink an image than it is to increase its size). Some of the sample images provided will illustrate what I'm talking about here.
Let's select the file "desert_landscape_4.jpg" for this example. When you dselect it and click the OK button (or double-click it), the browse dialog box is dismissed, and the image is immediately loaded into the weapon panel.

Once you've selected an environment image, more of the form will be usable, most notably allowing the selection of a paint system.
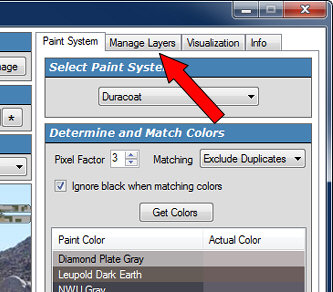
Select Paint System
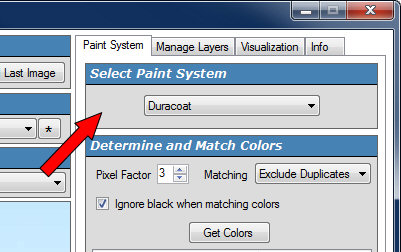
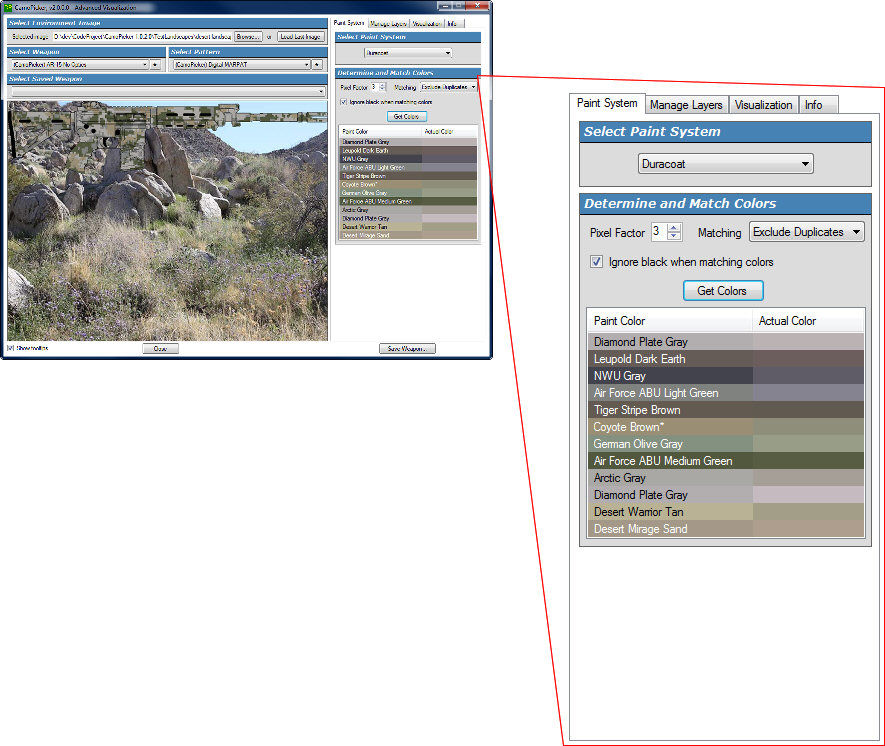
To select a paint system, locate the Select Paint System box (it's in the top-right corner of the form).
The default paint system is Duracoat because they offer the widest range of colors by far, as well as a large assortment of pattern color groups. Selecting a new paint system will automatically cause CamoPicker to determine/match colors, and then immediately visualize the currently selected weapon/pattern. For now, we'll just leave that alone, and move on to the next group of controls.
Determine Colors
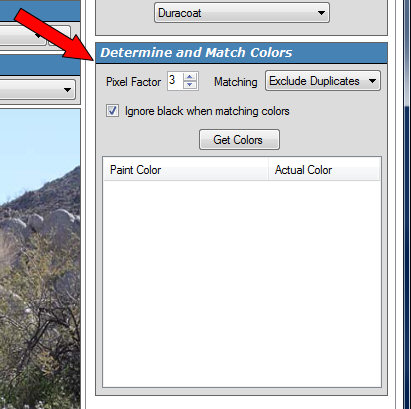
The reason we use CamoPicker is so that we can match paint colors to the environment. This group of controls allows us to perform this task.
The controls shown above perform like so:
- Pixel Factor - This value allows you some measure ofcontrol over how many colors are
"found" in the image. A factor value of 1 restricts the number found to just 1, a factor of 2
returns 4 course, and a factor of 3 results in 12 colors returned. A factor of 3 is the default
value.
- Matching - This control allows you to control how the colors are matched in the event
there are duplicate matches (which will happen more often than you might think). The possible
selections are:
- Allow Duplicates - All duplicate color matches are accepted.
- Remove Duplicates - All duplicate color matches are rejected.
- Exclude Duplicates - Any duplicate color match found is replaced with the next best matching color. This is the default matching mode.
- Ignore black when matching colors - Black is not generally considered to be a
naturally occuring color, so CamoPicker gives you the option of ignoring black
during the color matching phase. You should be aware that the matched color will always be
governed by your duplicate matching mode selection, so if you get a color you're not expecting,
your matching mode is probably the reason.
- Get Colors - This button actually performs the match. The image is pixellated and analyzed to select the appropriate number of matching colors.

Once you've selected your desired pixel factor and matching mode, and then clicked the Get Colors button, the list before the button is populated with the matched colors, the last two control groups are enabled, and your weapon is visualized onto the weapon panel.
Manipulating Matched Colors
Once the list of matched colors is populated, you have a certain degree of control over which of the colors are used in the visualized weapon, as well as the order in which they are used. To see what you can do, click the Manage Layers tab.
When you click the tab, you'll see this:
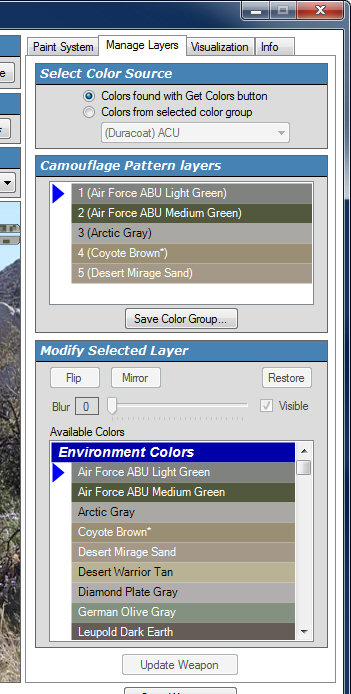
When a weapon is visualized, it uses a pattern (selected by the user) which is comprised of from one to six pattern layers. As these layers are applied to the visualized weapon, they are assigned a color, and overlayed on top of each other to form a composited pattern. This composited pattern is what you're seeing when the weapon is visualized in the weapon panel. The matched colors are applied in the order they are found in the image, which may or may not going to be the order in which you wish to use them. For this reason, CamoPicker allows you to manipulate the layers individually to accomplish the desired appearance.
Layers are managed by changing values in the Camouflage Pattern layers box.
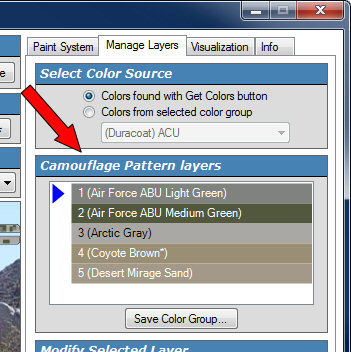
You'll notice there's a blue arrow next to the first layer in the list. This indicates which layer is currently going to be changed by the controls in the next control group. You will also notice that each layer shows the actual paint system name of the color it currently uses. This will help you later when you decide to purchase the paint to camouflage your weapon. Beneath this list of layers is the Modify Selected Layer control box.
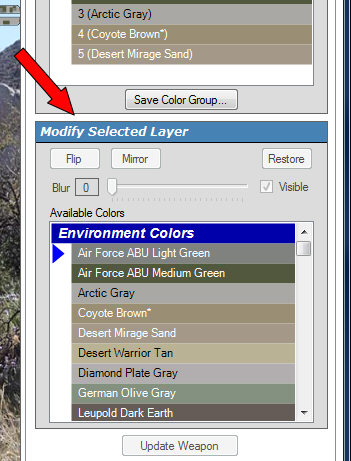
The changes made here will affect the currently selected layer. Since the first layer is selected, the ability to change the orientation or visibility of the layer is disabled. The reasoning is that the first layer of a pattern is a solid layer, and changing its orientation or visibility is pointless. You can however change the color of the layer via the Available Colors list.
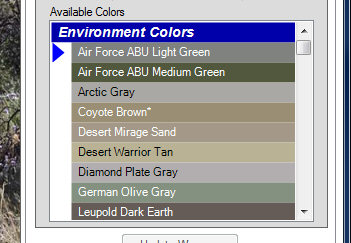
This list contains all of the colors in the current paint system, with the environment match colors shown in their own section so they're easy to find. The remaining (un-matched) colors are shown in the Other Palette Colors section of the list.
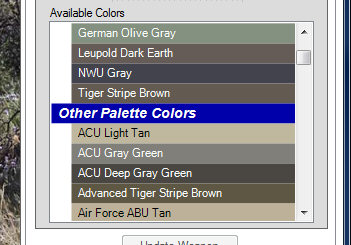
This arrangement allows you to easily find the matched colors, yet select ANY color from the current paint system.
Typically, the base color of a camouflaged weapon is the lightest of the colors used in the paint scheme, and they are then alternated bewteen light and dark shades as layers are applied. To rearrange the colors, simply select the layer to change, and select a color from the Available Colors list. When you're happy with your selections, click the Update Weapon button at the bottom of the tab.
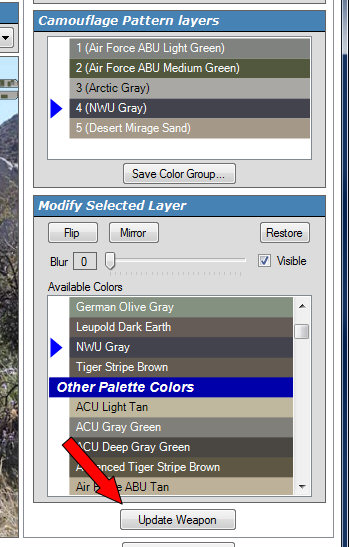
As you can see in the image above, I changed the color of layer #4 to NWU Gray. When I clicked the Update Weapon button, the weapon was re-rendered with the new layer #4 color. The new color selection results in a more concealable weapon, and that fact is immediately obvious when the weapon is updated.
In addition to layer colors, you can further maniuplate the layers by flipping and/or mirroring them, setting a blur value, and even hiding a given layer. In my humble opinion, discussing minutia like that would be a waste of bandwidth, so feel free to play around with these buttons at your leisure. Just remember, these controls change the currently selected layer - NOT the weapon itself. After using these controls, you have to click the Update Weapon button to see the effect on the visualized weapon.
Manipulating the Visualized Weapon
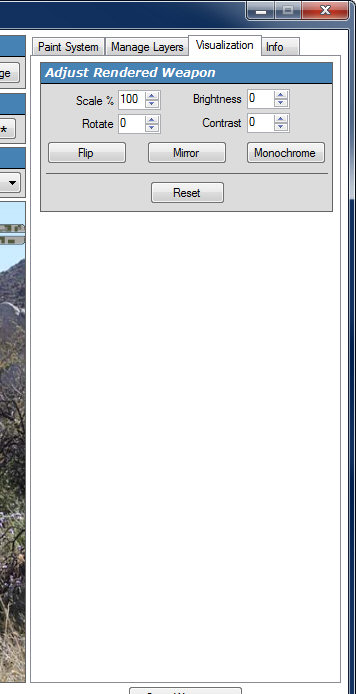
Now that a weapon has been visualized, you can use the controls on the Visualization tab.
The controls in this group changes the appearance of the visualized weapon as indicated by their labels:
- Scale - Scale the image from 100% down to 5%
- Rotate - Rotate the image clockwise fomr 0 to 360 degrees
- Brightness - Change the brightness from -100 to 100
- Contrast - Change the contrast from -100 to 100
- Flip - Flips the weapon image on its vertical axis (turns it updside down from its
current orientation)
- Mirror - Flips the weapon image on its horizontal axis (swaps left and right ends)
- MonoChrome - Changes the environment image and the weapon image to a gray-scale
representation, or back to color again.
- Reset - Resets all of the controls in this group, and puts the weapon back in its
original psotion.
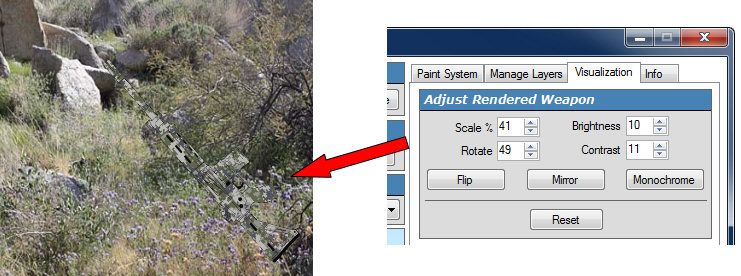
Here's what a scaled, rotated, flipped, mirrored image looks like with contrast and brightness changes.
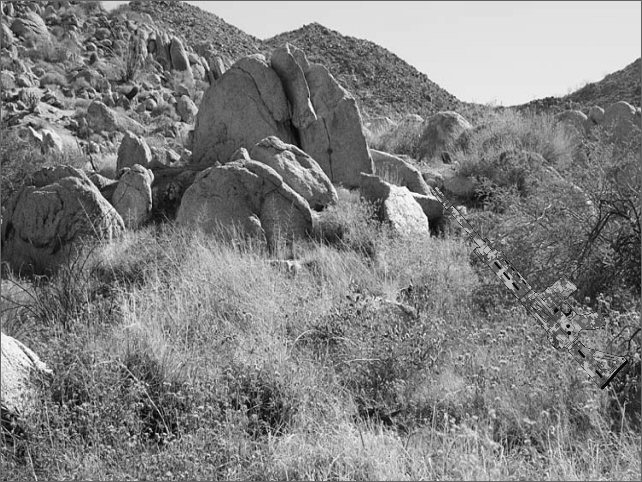
The last major feature regarding visualization is the Monochrome button. This button will toggle the environment image and the visualized weapon from color to black/white or from black/white to color. The reason this feature was added is that if you can camouflage a weapon so well that it can be hidden in a black/white photo, then it willbe equally effective in a real color environment. Here's our current weapon after clicking the Monochrome button.
Now that we've talked about basic usage, we can get into the more esoteric features found in CamoPicker.
Saving a Visualized Weapon
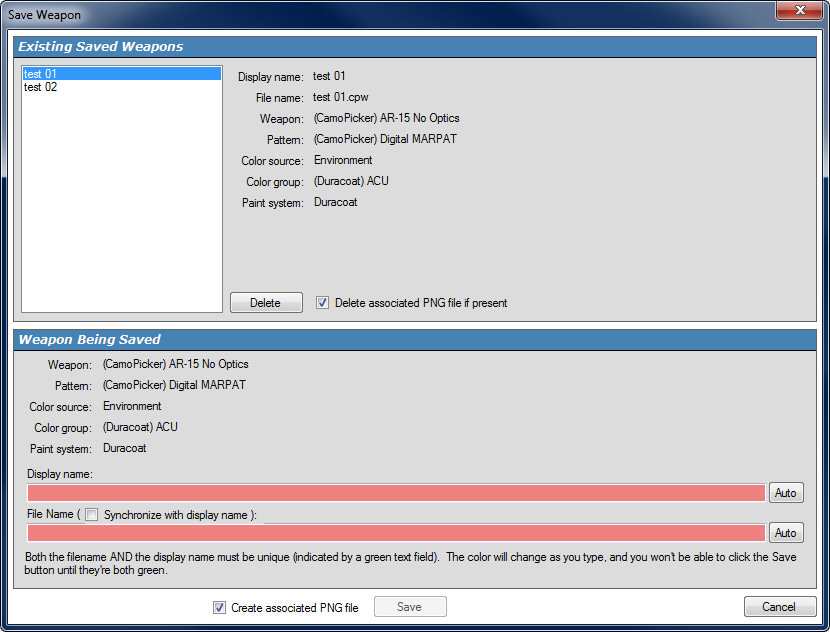
Once you've visualized a weapon, you can save it. A saved weapon includes all of the settings you've used to create the visualized weapon, including the weapon template, pattern, layer settings and color source. This means you can come back at any time, load the saved weapon, and adjust those settings at a later date. Besidessaving the data itself, the visualized weapon is saved in your MyPictures folder as a PNG file. This makes it handy and simple to include your visualized weapon in your sig on the many gun-related forums that you probably frequent. This is the form you'll see when you click the Save Weapon button ----->
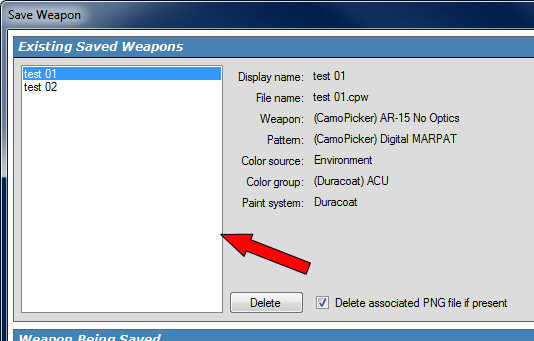
At the top of the form, you'll see the Existing Saved Weapons panel. This panel contains a list of previously saved weapons. This list includes ALL saved weapons for all paint systems because no two paint systems can have the same file name or display name.
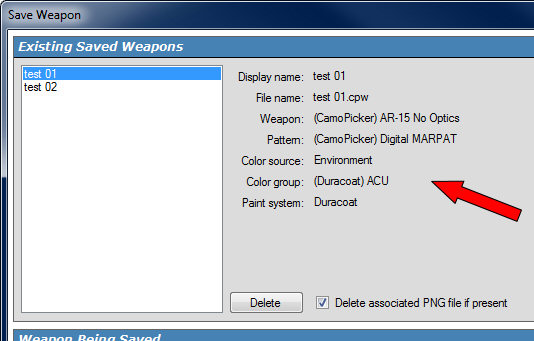
To the right of the list, the details of the currently selected weapon are displayed. This allows you to view the pattern, weapon, paint system and other settings that makup the selected weapon.
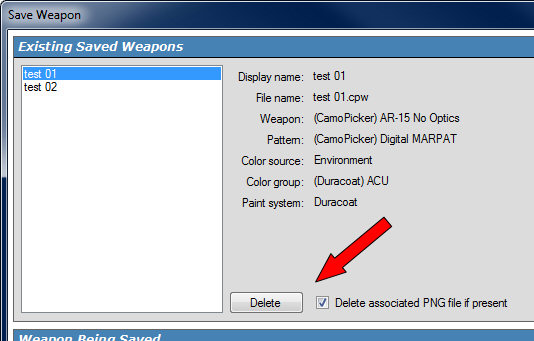
The last thing you'll see in the panel is the Delete button and a checkbox that allows you to optionally delete the associated PNG file.
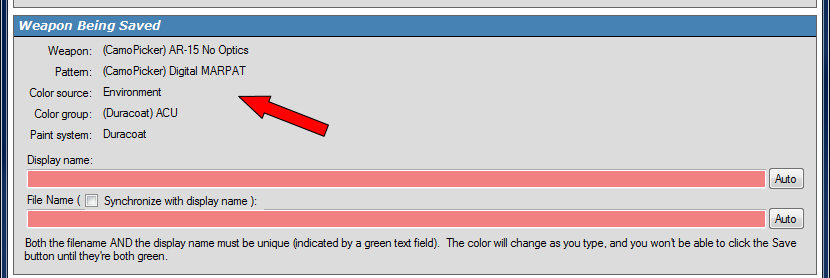
Beneath the Existing Saved Weapons Panel is the Weapon Being Saved panel. This panel contains the details of the weapon being saved:
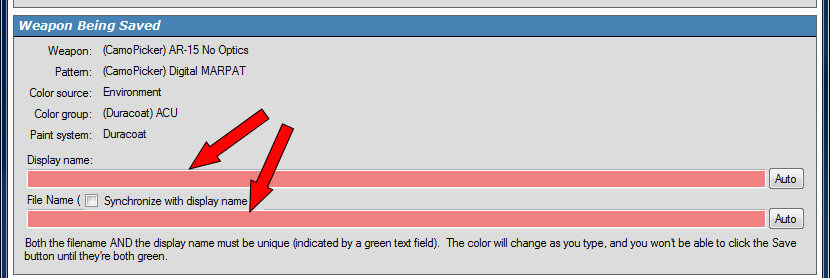
And it provides two text fields to allow you to specify a display name (how it shows up in the program) and a file name.
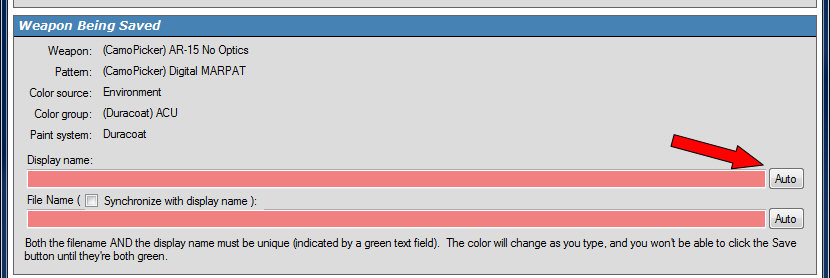
To make it easier for you to come up with a descriptive file name, there is an Auto button associated with each text field. These button will automatically combine the various visualization components to build a display name or file name.
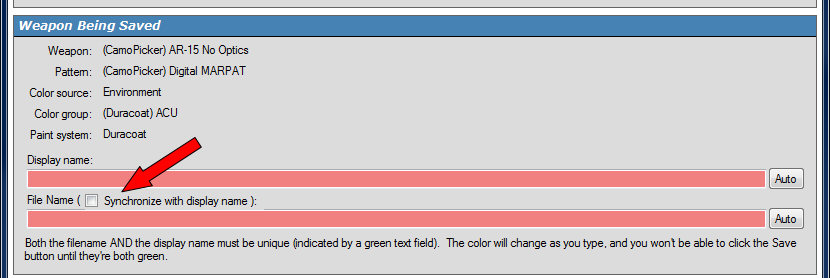
Finally, you can check the Synchronize box, which will cause the file name to match whatever text is typed in the display name field.
By now, you've probably noticed that the edit fields have a red background. The red background indicates that the contents of the field are somehow invalid. In the case of the display name, the background will be red if the display name is the same as any existing saved weapon (in the list at the top of the window). For the file name, it could mean either that the file name is the same as that of one ofthe existing files, or that an invalid character has been typed into the field (or that the filename is an filename reserved for the operating system (such as COM, CON, and things like that). Once both a valid display name and a valid file name have been specified, you will be allowed to save the weapon.

The Save button will become enabled, and you can also chose to create or not create an associated PNG file (a visualized representation of the saved weapon).
Appendix A - Definitions
Paint system - A paint system represents the colors available from a given manufacturer. Some paint manufacturers may even define color groups for given patters (Duracoat does this). These color groups are also represented if available.
Pattern Color Group - A pattern color group represents a specific set of colors recommended by a paint system manufacturer in order to implement a given patter with colors appropriate to that pattern.